The Chart of Accounts contains the accounts that are affected by each transaction you make in Dealerlogic. These accounts are divided into 8 sections, which describe and contain the different types of available accounts.
The default Chart of Accounts in Dealerlogic Accounting can be modified to suit your dealership’s requirements by adding to, deleting or editing the accounts that we have prepared earlier.
Each section within the General Ledger, Sales, Expenses, Costs of Sale etc, have their own sequence of Account numbers beginning with a unique Alpha character. That means that an account cannot be moved from one section to another. however you can re-arrange the sequence in which accounts are displayed within each section by changing their Account Number. Each account has its own Account Id behind the scenes, so you can safely change its Account Number and know you won't affect any of the associated transactions. By altering the account number you can move the account up or down in the list for that section. |
•Select the correct account type (Title, Normal, Bank). oTitle Accounts are used for summary totals in your reporting and do not store values in the General Ledger. oNormal Accounts are used for storing values in the General Ledger but are not accounts that can be used for bank reconciliation. oBank Accounts are used for storing values in the General Ledger and are used for bank reconciliation. If you have an account that is not a true bank account but required reconciliation, you can set such accounts up as bank accounts in the general ledger. If the type bank account is selected you can set up your bank account details including an icon representing your bank or financial institution. Accounts created as Bank can also have information entered to help you record transactions more quickly. You can enter the Default Payment Method for example, and whenever a transaction is created using that account, the payment method you’ve selected will appear. Of course it can be changed for individual transactions. Additionally, if a Bank account also has cheques, it can be edited to automatically generate the next cheque number. To do this, use the Tick Boxes to indicate that it is a Cheque Account, AND that you need cheque numbers allocated, and also enter the number of the next available cheque. •Select the Default Tax Code that will apply to transactions made for this account. •Click Save. Your account is now created and will be displayed highlighted in the Chart of Accounts Maintenance Window. •Structure your Chart of Accounts hierarchy by using the Indentation slider on the Chart of Accounts Maintenance Window. Move the slider to the desired position with your mouse by clicking and holding the right mouse button while you move the slider. Note: Moving the slider to adjust the hierarchy of accounts may change the position of related sub-accounts in their hierarchical order. |
•Open the Chart of Accounts from the Logic Centre or Dealerlogic Menu. •At the top of the Chart of Accounts Maintenance Window, click the appropriate Tab for the account you are editing (Asset, Liability, etc…). •Highlight the account you wish to edit by clicking it once with your mouse. •Click the ‘Edit’ button on the bottom of the Chart of Accounts Maintenance Window. The view will change to display the Account Details. •Make the required changes to the account. •Click Save. Note: you cannot change the account group within which the account exists, i.e. an account in the Sales group cannot be changed to the Cost of Sales group, or to the Other Income group. |
Deleting accounts in the Chart of Accounts can only be performed if there have never been transactions attributed to the account. If the account has been previously used it is there forever. How do I do this? •Open the Chart of Accounts from the Logic Centre or Dealerlogic Menu. •At the top of the Chart of Accounts Maintenance Window, click the appropriate Tab for the account you wish to delete (Asset, Liability, etc). •Highlight the account you wish to delete by clicking it once with your mouse. •Click the ‘Delete’ button on the bottom of the Chart of Accounts Maintenance Window. The highlighted account will now be removed. |
If you no longer wish to use a particular account, marking it as Inactive will mean it no longer appears in the Account Selection lists from within transactions. It will still appear in the Chart of Accounts, and will also be included in Reports where transactions are recorded for the account. To perform an Account Inquiry on an Inactive Account, type in the exact account number as it cannot be selected from the list. Otherwise, open an Account Inquiry window from the Chart of Accounts display window with that account highlighted. How do I do this? •Open the Chart of Accounts from the Logic Centre or Dealerlogic Menu. •At the top of the Chart of Accounts Maintenance window, click the appropriate Tab for the account you wish to mark inactive (Asset, Liability etc…)
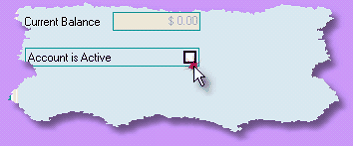
•Edit the account you wish to mark Inactive. •Untick the “Account is Active” tick box. |
